
Aggregate is a fantastic choice for paths, driveways, garden borders, and even around outdoor features. It’s strong, looks good, and can be matched to almost any style. But here’s the thing, no matter how nice the aggregate is, it won’t stay that way if the ground underneath hasn’t been prepared properly.
Skipping preparation is like building a house without foundations, it might look fine at first, but it won’t last. Taking the time to get the ground ready will make your aggregate surface more stable, longer lasting, and better looking.
At MI Organics, we’ve seen plenty of projects across Coffs Harbour, Grafton, Townsend, Nambucca, and Woolgoolga where a bit of extra groundwork made all the difference.
Steps to get the ground ready for aggregate
Step 1. Clear the area
The first step is simpleM clear away anything that’s in the way. That means removing weeds, grass, old mulch, or leftover debris. If you lay aggregate over weeds, they can still push through and spoil the surface.
Use a shovel, hoe, or even a weed spray if the area is large. For stubborn patches, you can cover the ground with a tarp for a week or two to block sunlight and stop growth.
If you’re working around garden beds, keep an eye out for any plant roots creeping in, they’ll need trimming back so they don’t cause uneven patches under your aggregate later on.
Step 2. Level and shape the ground
Once it’s cleared, level the ground to match the layout you want. If it’s for a driveway, make sure you’ve got a gentle slope so water runs away and doesn’t pool in the middle. For paths, think about where the water will go when it rains.
Use a rake to spread soil evenly and a straight board or level to check the surface. The more time you spend here, the better your aggregate will sit.
Step 3. Compact the soil
Loose soil shifts easily, and that’s bad news for aggregate. Compacting the ground gives it a solid base so your aggregate doesn’t sink or move.
You can hire a plate compactor for bigger jobs or use a hand tamper for smaller areas. Go over the space a few times until it feels firm underfoot. If you notice any soft spots, fill them in and compact again.
Step 4. Add a base layer
A good base layer is the secret to keeping aggregate stable. This is usually made from coarse gravel or crushed rock. Spread it evenly to a depth of around 5-10cm, depending on the job.
This base does two things, it adds strength and improves drainage. Without it, water can collect under your aggregate, making it muddy and uneven.
At MI Organics, we stock base materials along with a wide range of aggregate, pebbles, garden stones, and gravel, so you can get everything you need in one go.
Step 5. Compact the base layer
Just like the soil, your base layer needs compacting. This locks the pieces together and gives you a firm, even surface. Run the compactor over it until it feels solid.
If the area is large or you’re building a driveway, it’s worth doing two layers, compact the first layer, then add a second and compact again. It’s a bit more work but gives better long-term results.
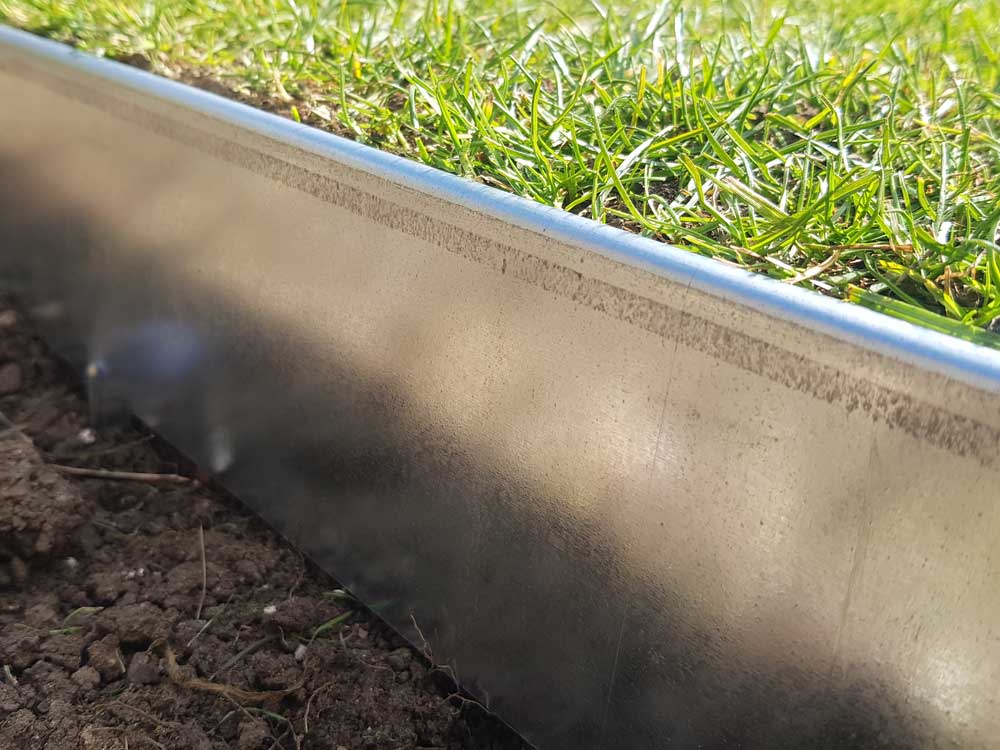
Step 6. Install edging
Edging keeps it from spreading into lawns or garden beds. It can be made from timber, stone, metal, or brick, depending on the style you want.
Not only does edging make the area look finished, but it also stops the edges from wearing away over time. For paths and driveways, edging is especially important to keep your aggregate in place when there’s foot or vehicle traffic.
Step 7. Lay a weed barrier (optional but helpful)
If you want extra protection against weeds, you can put down a weed mat before adding the top layer of aggregate. This is a breathable fabric that lets water through but blocks light, making it harder for weeds to grow.
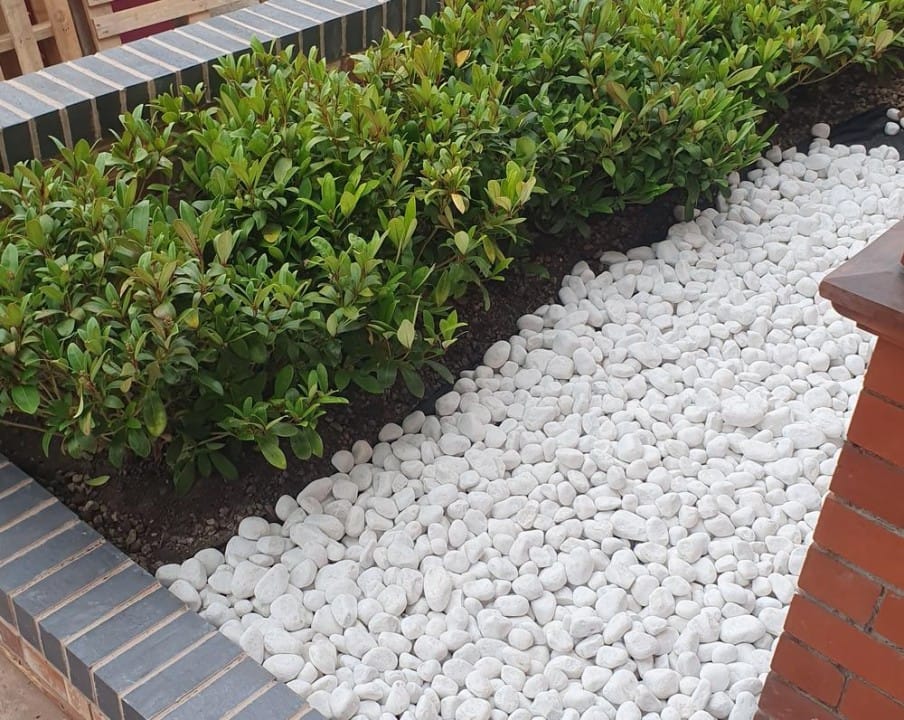
For decorative areas with pebbles or garden stones, a weed barrier can save you a lot of maintenance later on.
Step 8. Spread your aggregate
Now for the fun part, adding your aggregate. Whether you’ve chosen fine gravel, smooth pebbles, or a mix of garden stones, spread them evenly across the area.
Aim for a depth of 5-8cm for paths and decorative areas, and around 8-10cm for driveways or spaces that get more use. Too thin and the ground will show through; too thick and it can feel unstable.
If you’re not sure how much aggregate you need, MI Organics can help you calculate the right amount and deliver it straight to your site.

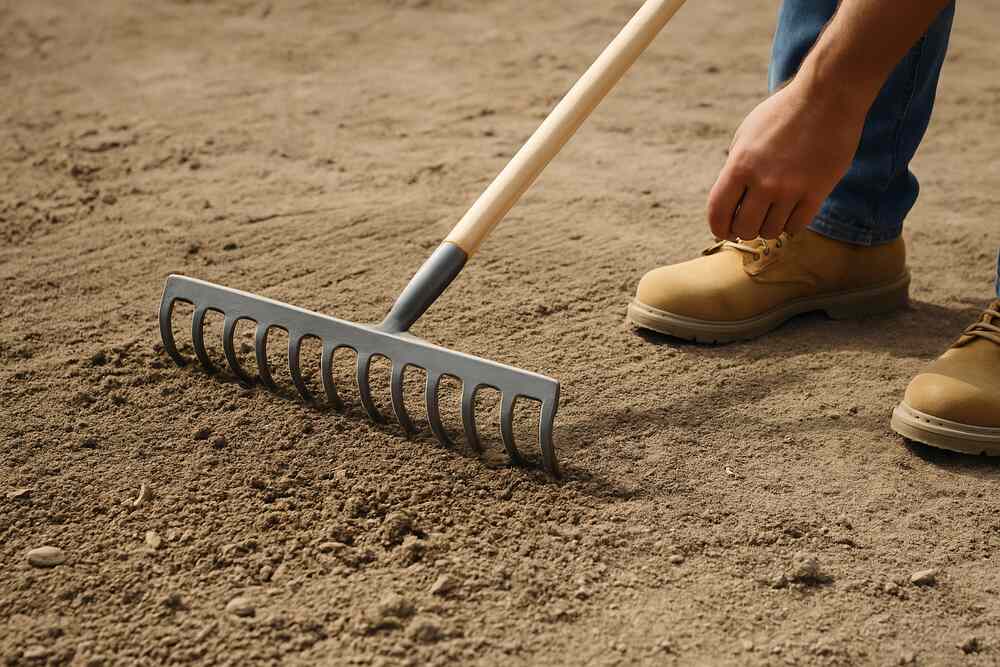
Step 9. Rake and settle the surface
Once the aggregate is down, give it a light rake to even it out. For driveways, you might want to compact it slightly to help it bed in. For decorative areas, just a gentle rake is enough to get a neat finish.
Watering the area lightly can also help the aggregate settle, especially if you’re using finer gravel.
Choosing the right aggregate for the job
Preparation is important, but so is choosing the right type of aggregate. For driveways, you’ll want something that locks together well and can handle weight, usually a mix of gravel sizes. For paths, smaller pebbles are easier to walk on. For decorative borders, garden stones can add colour and texture.
At MI Organics, we’ve got a range to suit every job, and our yards in Coffs Harbour, Grafton, Townsend, Nambucca, and Woolgoolga make it easy to find what you need.
Common mistakes to avoid
- Skipping the base layer, it leads to sinking and uneven surfaces.
- No edging, aggregate will spread out over time.
- Poor drainage causes puddles and soft patches.
- Uneven surface prep makes the finished job look messy.
Laying aggregate isn’t complicated, but the prep work is what makes it last. Clear the area, level it, compact it, add a base, and finish with edging before spreading your aggregate. A few extra steps now will save you a lot of work later.
If you’re ready to start, MI Organics can supply high-quality aggregate, pebbles, garden stones, and gravel, along with base materials and delivery across Coffs Harbour, Grafton, Townsend, Nambucca, and Woolgoolga. With the right start, your aggregate surface will look good and stay that way for years. Contact us today!